Store settings
Support for multiple stores
Starting with the 2305 release, IT administrators can assign multiple stores to end users. Now, it’s easy for end users to switch between multiple stores without needing to remember the exact store URL. This feature improves the user experience when accessing multiple stores.
Multiple StoreFront
You can change the Store address without having to restart Citrix Workspace. Existing Citrix Workspace sessions, if any, continue to run uninterrupted.
To add stores:
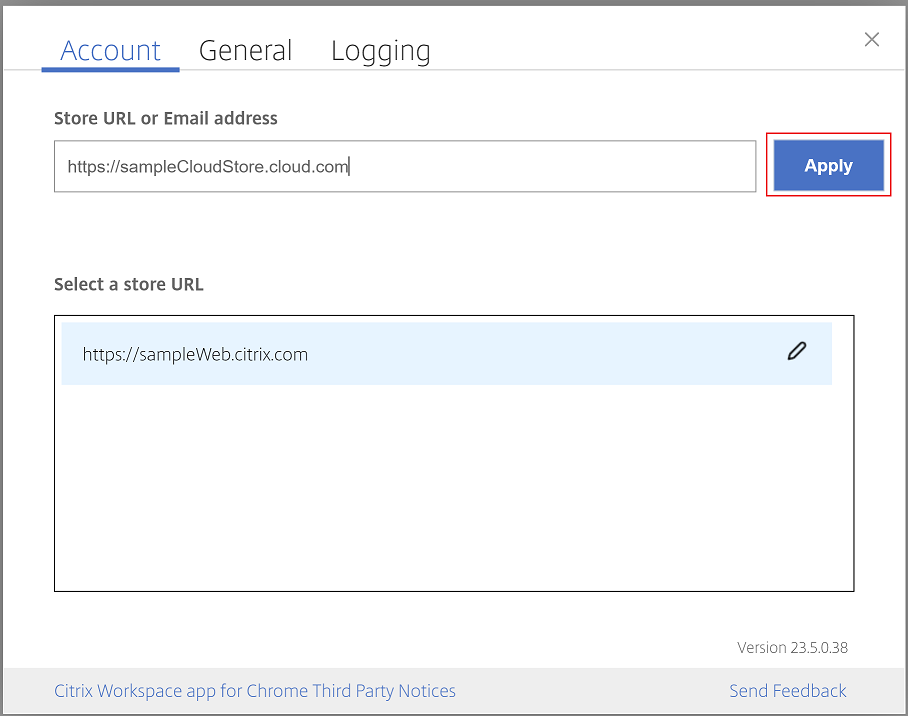
- Click Settings in Citrix Workspace app for ChromeOS, and select the Account tab.
- Enter the StoreFront URL or email address in the Store URL or Email address field.
-
Click Apply to save the new store.
To switch stores, select a store from the Select a store URL list.
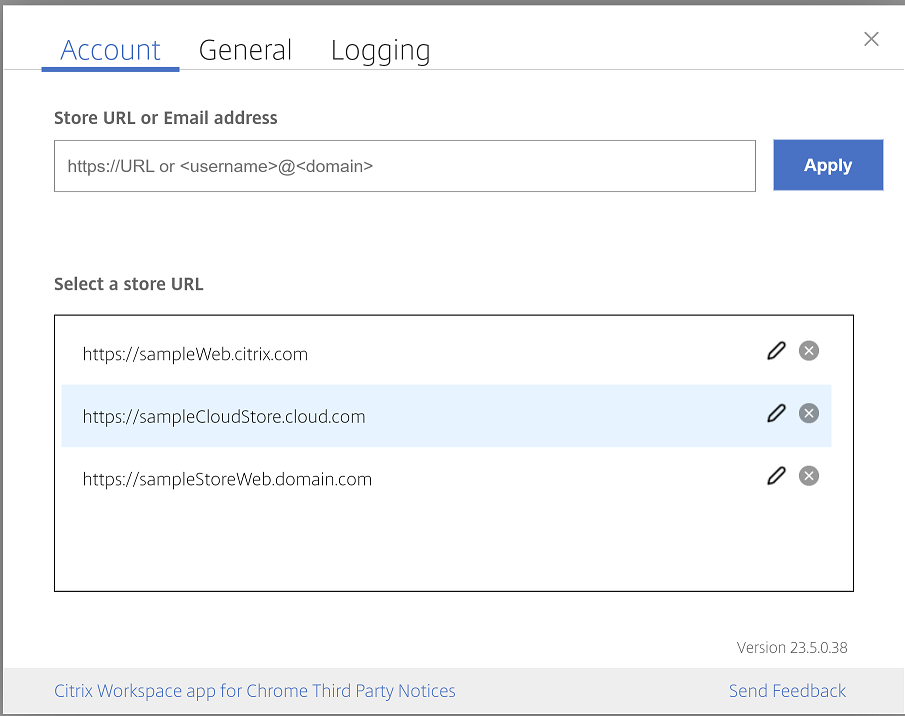
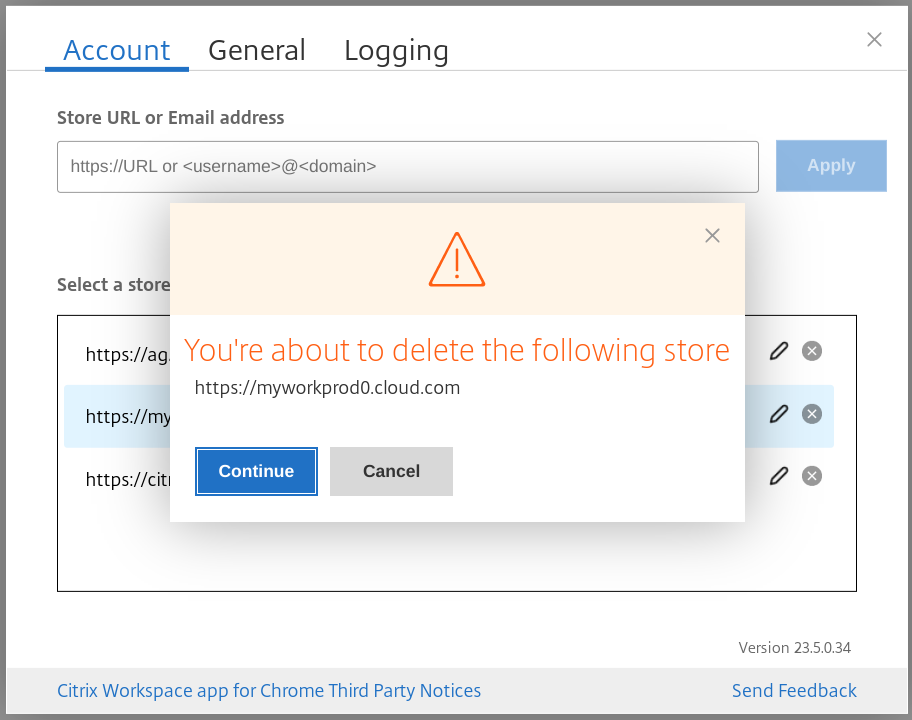
To delete a store from the list, click the ![]() next to the store address you want to delete and confirm deletion.
next to the store address you want to delete and confirm deletion.
Reload store
In Citrix Workspace app for ChromeOS window, a button is added for reload operation. When you click the button, the cookies of the store get cleared and the store page is reloaded.
Refresh store
Starting with the 2307 release, you can apply the following configurations to avoid duplicate instances of the published apps.
Note:
- By default, the configuration is disabled. When you enable this configuration, you don’t see the duplicate instances of the published app. Click the
icon to refresh the store.
Email-based store discovery
You can now use your email ID to access the Citrix Workspace app without the need to memorize the Store URL. The stores assigned to your account are automatically populated. Navigate to Accounts > Store URL or Email address drop-down menu to view the list of stores associated with your email.
Note:
You can still use the store URL to sign in.
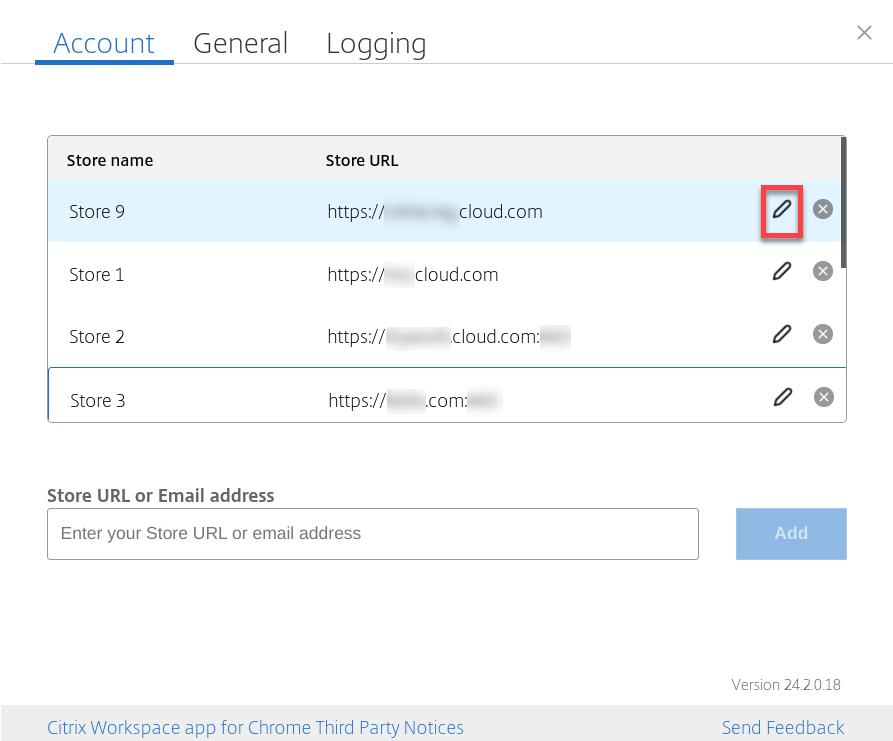
Short name for store URL
Previously, you were able to see the store URLs, but there was no provision to add or modify a short name for the store URLs. This arrangement made it difficult for the administrators and users to remember the store URLs.
Starting with the 2402 release, for managed users, administrators can push a custom store name along with the store URL from the Google Admin Console. This feature makes it easier for users to identify the different stores. Also, the administrator can decide if the user can edit the store name or not by setting the attribute allowEditStoreName to true or false. For more information, see the following configuration section.
For BYOD users, the store name is auto-generated. For example, Store, Store 1, Store 2, and so on. The stores are populated using the email-based store discovery feature. Users can edit the store name as required.
Feature limitation
- The service continuity feature might not work properly when end users edit a store URL. [RFHTMCRM-13741]
How to use the feature
By default, BYOD users can edit the store name. Whereas, for managed users, if your organization’s administrator provides permission to edit the store name, you can:
- Start Citrix Workspace app for ChromeOS.
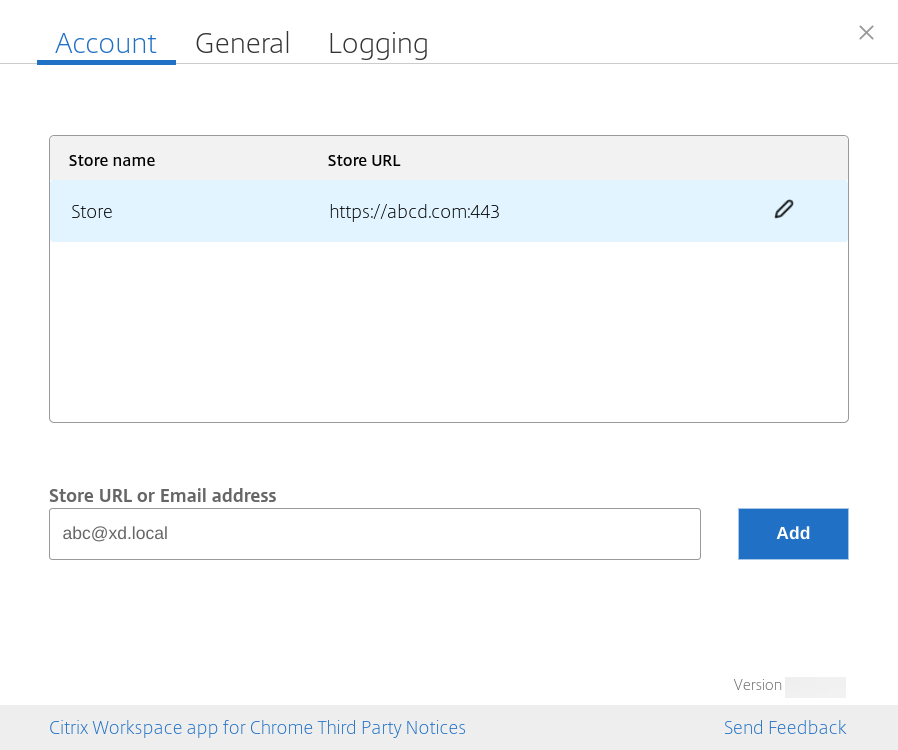
- On the Account tab, identify the store URL that you want to edit.
-
Click the Edit Store Button icon.
The Edit Account dialog box appears.
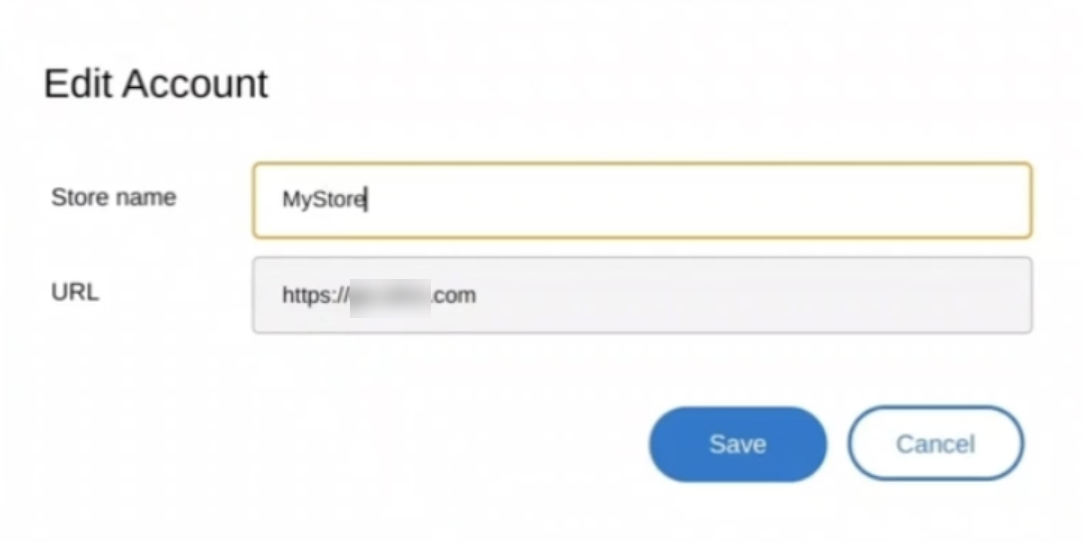
- Enter the Store name that you can associate with.
- Click Save.