Session experience
Support for external webcam
Citrix Workspace app for Android now supports externally connected webcams within your sessions. Connect a USB webcam and use it for video conferencing by clicking the camera icon, then select the external webcam name. It enhances the session experience by using the resources available to end users.
Note:
The external webcam’s name appears only after an external camera is detected.
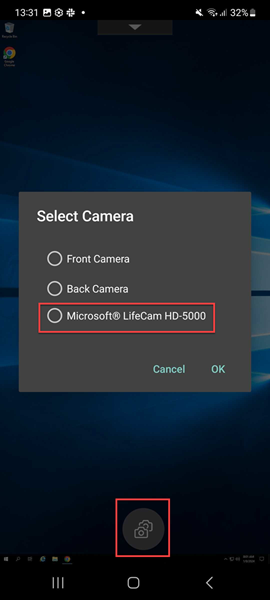
The next time you use a video conferencing app, the system remembers your preference and uses the camera preference accordingly. For example, if you had completed the last video call with an external webcam preference, next time the external webcam is selected by default.
You can change your camera preference by tapping the camera icon on your screen. You can also change the camera preference during your calls.
Notes:
- When you remove the external camera, the floating multiple-camera icon
changes to a flip button
. The Select Camera dialog closes if it’s open and the external camera view on the VDA becomes unresponsive.
- This feature is applicable on both on-premises and cloud deployments.
DPI Matching
The DPI matching feature ensures that the virtual session gets rendered according to the DPI of the device. Previously, even on high-DPI mobile phones and tablets, the DPI of the device wasn’t considered for session display. Starting with the 24.1.0 release, a new display setting helps to achieve DPI matching.
On your device, go to Citrix Workspace app for Android Settings > General > Display > Session Resolution > and select the Match client DPI option.
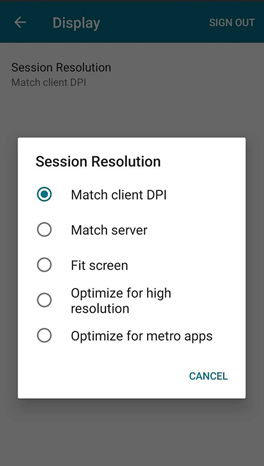
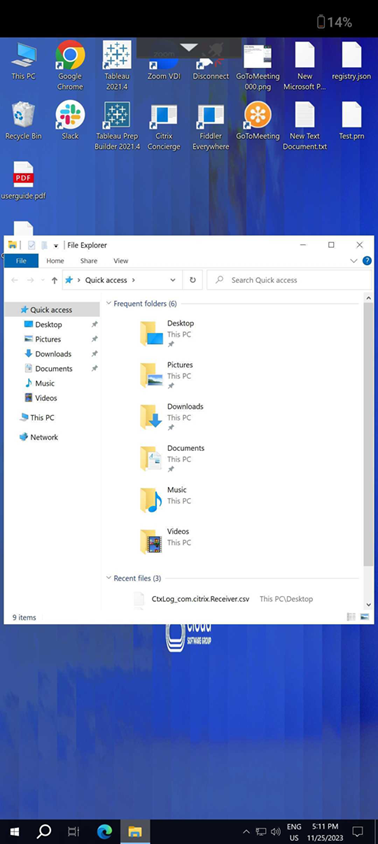
In other words, the Citrix Workspace app attempts to match the display resolution and DPI scale settings of the Android device to the Citrix session automatically. This feature enhances the user experience by displaying the sessions according to the DPI of the phone or tablet. The session icons, text, and image clarity are now sharper and more comfortable to read.
For example, when you select the Match client DPI option, the session icons, text, and images are clear.
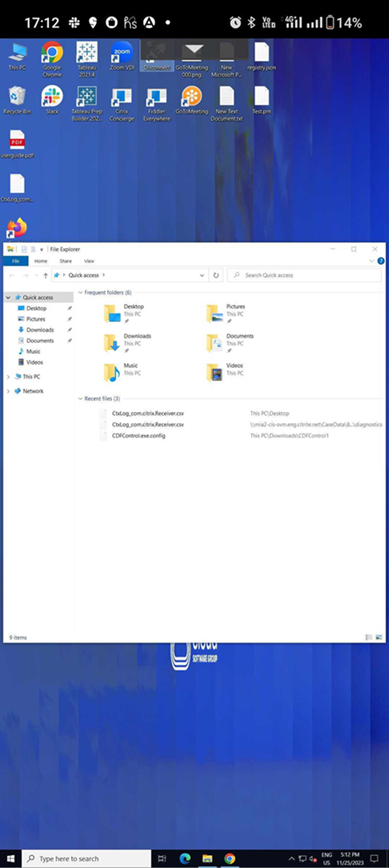
On the contrary, when you select the Fit screen option, the session icons, text, and images are smaller in size.
Note:
When you connect an external monitor, the session continues to render with the primary device’s DPI because of Android’s limitation.
Scancode input mode for external keyboard
Starting with the 24.1.0 release, you can select Scancode as the keyboard input mode while using an external physical keyboard. This feature is helpful when you use Android devices with an external Windows PC’s standard keyboard. Similar to using the Samsung DeX feature.
With Scancode, you can use the keyboard layout of the VDA instead of the Android’s soft keyboard. In this way, you can completely follow the input style of Windows instead of Android. It’s beneficial when typing in East-Asian languages, as it significantly improves the overall user experience. The end user might find themselves using the keyboard layout of the server instead of the client. For more understanding, see the Use Case section in this article.
How to use the feature
To use the scancode feature:
- Open Citrix Workspace app for Android and navigate to Settings > General > Keyboard.
-
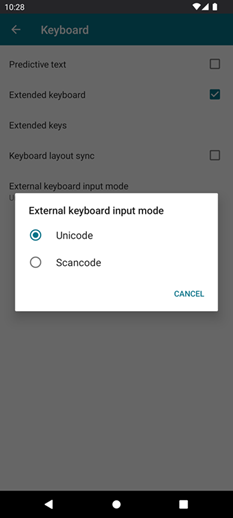
Tap External keyboard input mode.
-
Select one of the following options:
-
Scancode - Sends the key position from the client-side keyboard to VDA and VDA generates the corresponding character. Applies server-side keyboard layout.
-
Unicode - Sends the key from the client-side keyboard to VDA and VDA generates the same character in VDA. Applies client-side keyboard layout.
By default, Unicode is selected as the external keyboard input mode.
-
-
Tap Scancode.
When you are in a session, you can switch the remote keyboard using the IME feature and input in the server keyboard layout.
Use case
For example, consider a scenario where you’re using a US international keyboard layout connected to your Android device.
When you choose Scancode and type the key next to the CapsLock on your external keyboard, the scancode 1E is sent to the VDA. The VDA then uses 1E to display the character a.
If you choose Unicode and type the key next to CapsLock on your external keyboard, the character a is sent to the VDA. So, even if the VDA uses another keyboard layout that has a different character in the same position, the character a appears on the screen.
Note:
Unicode is the preferred mode for typing when you use a touch keyboard on your mobile devices. This is because the keys on a touch keyboard generally don’t generate a scancode.
Accessibility and TalkBack
Citrix Workspace app provides an enhanced user experience with the TalkBack feature. The TalkBack feature helps end users who have difficulty seeing the screen. The narrator reads the screen elements aloud when using the UI.
To use the Android talkback feature:
-
End users must enable the Talkback feature it from Android Settings > Accessibility > Talkback.

-
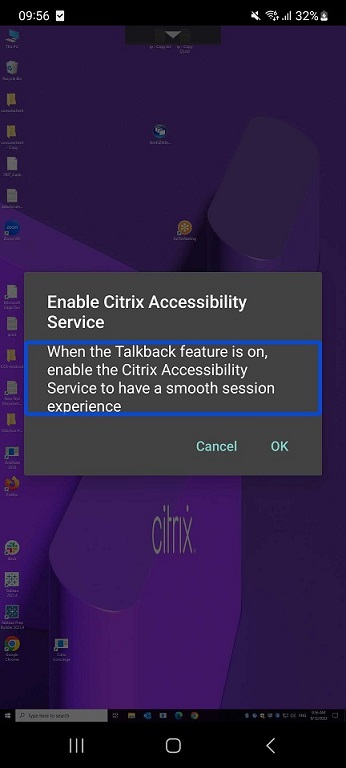
To use a virtual desktop session with the TalkBack feature, end users receive a dialog to enable Citrix Accessibility service from Android Settings > Accessibility > Installed app > Citrix Accessibility Service.
On some devices, the path might be Settings> Accessibility > Citrix Accessibility Service.
-
Tap OK.
-
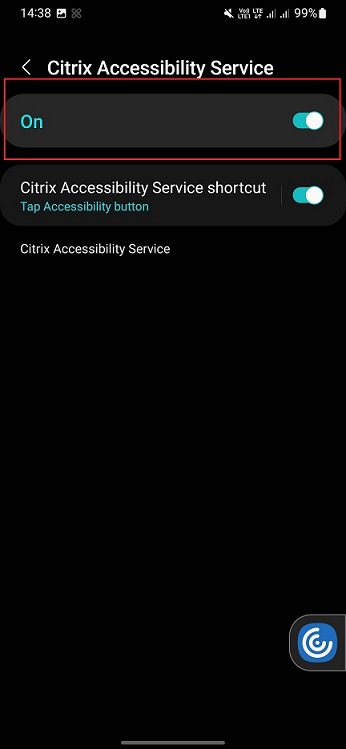
Enable the Citrix Accessibility Service option to use the Talkback feature.
Note:
In a session, when the Talkback feature is enabled on the device, end user can use the two-finger long press to access the Citrix Workspace app toolbar.
Known issues in the feature
-
When you attach an external keyboard to your device:
- To use the CapsLock key as the narrator key, the action might not work as expected. As a workaround, press the Insert key. [HDX-55347]
- To use the key combination Win+Ctrl+Enter to enable the narrator, the action doesn’t take effect inside the virtual desktop session. As a workaround, use the Win key or the Start menu and enter the word Narrator. [HDX-55380]
Addition of Ctrl+Alt+Del shortcut in session toolbar
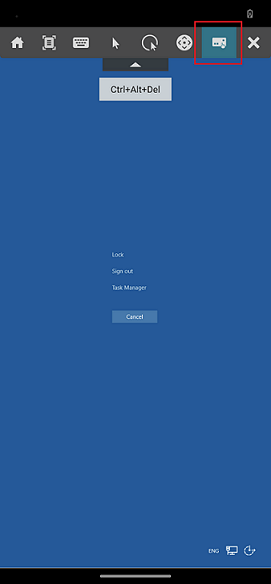
Starting from the 23.9.5 version, the session toolbar has an option to do the Ctrl+Alt+Del function with the tap of a button. This option facilitates users to sign out, switch users, lock the device, or access the Task Manager.
Document scanner
If you’re signed into Citrix Workspace app, you can use the document scanner feature to scan many documents and transfer those scanned documents into the desktop session.
Note:
- This feature is enabled by default.
Prerequisites
- Client drive mapping (CDM) must be enabled for the store.
- Document scanner requires read and write access on your device. To enable access, follow these steps:
- From your profile, tap application Settings > Store settings.
- Tap your current store.
- Tap Device Storage and then select Full access.
How to use the feature
To scan the documents:
-
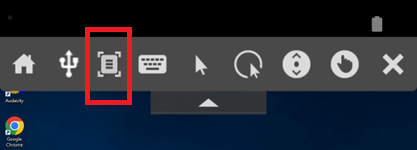
From the in‑session toolbar, tap the document scanner icon.
-
Tap ADD IMAGE to start scanning.
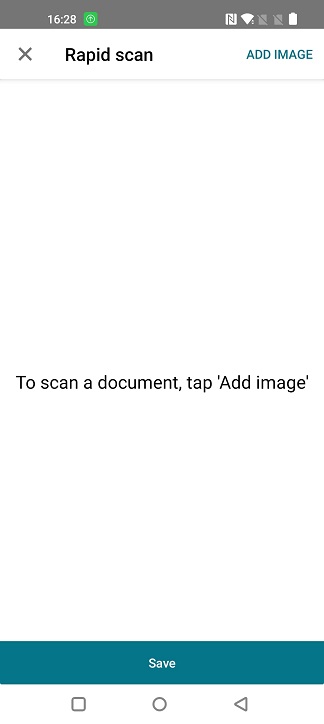
The camera app opens and you can start taking the photos.
-
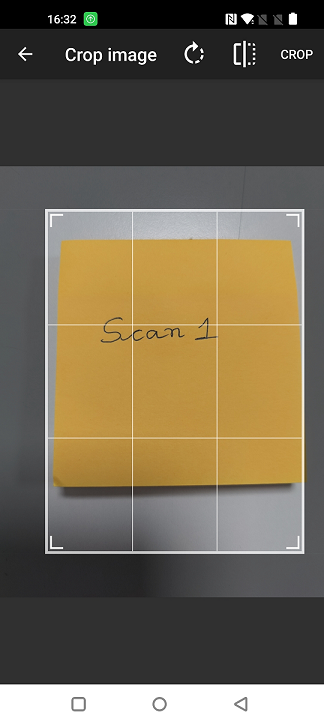
(Optional) Crop the scanned document. After cropping to the required size, tap CROP.
-
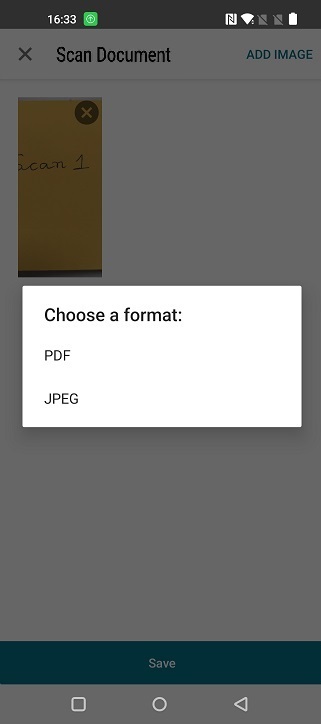
Choose from the options to save the file in the required format.
-
Tap Save.
All the scanned documents are accessible inside the folder CitrixRapidScanDocuments on the external storage of your device. You can access the scanned documents through:
- File manager on your device
- Client drive mapping (CDM) on your virtual desktop.