How to use Citrix Secure Access from your Android device
Notes:
Starting from release 23.12.1, Citrix SSO for Android is renamed to Citrix Secure Access. We are updating our documentation and the UI screenshots to reflect this name change.
For administrator-specific instructions on how to use Citrix Secure Access for Android, see Citrix Secure Access for Android devices.
Install Citrix Secure Access from your Play Store. First-time users must create a connection to NetScaler Gateway by adding the server in non-MDM case. For subsequent uses, you can connect to an existing connection or add a connection, and edit existing connections as well, if allowed by your administrator in an MDM deployment. You can also view the logs and take appropriate actions accordingly.
Notes:
Connections deployed via MDM cannot be edited.
Starting from Citrix SSO for Android 23.8.1, you might be prompted to grant the Query all packages consent to the Citrix SSO app. Once the consent is granted, the Citrix SSO app:
- Receives the package install notification from the operating system.
- Restarts the Always On VPN.
When you connect to your VPN profile for the first time, you are prompted to provide consent (required by Google policies) to collect information of the installed package. If the you grant the consent, the VPN connection is initiated. If you deny the consent, the VPN connection is aborted. The consent screen does not reappear once the consent has been granted.
Add a connection
Note: This step is required only in a non-MDM case.
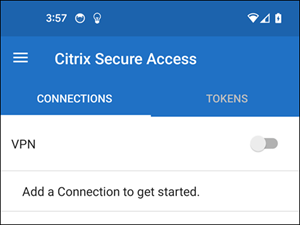
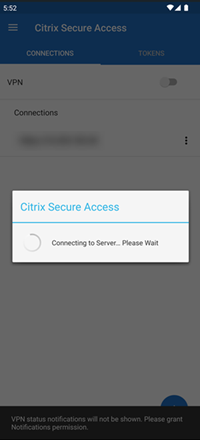
After you install Citrix Secure Access and open the app on your Android device, the following screen appears.
-
Click + to add a connection.
-
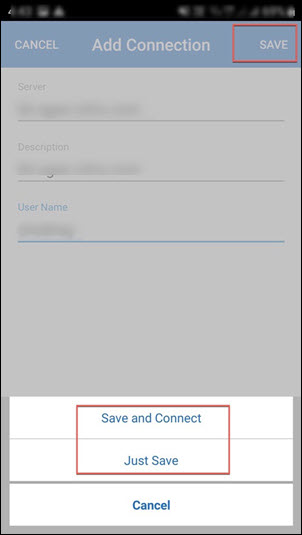
Enter the base URL (for example, https://gateway.mycompany.com) and the name for the VPN connection. Optionally, you can enter the user name.
-
Click Save and then click Save and Connect or Just Save as appropriate.
-
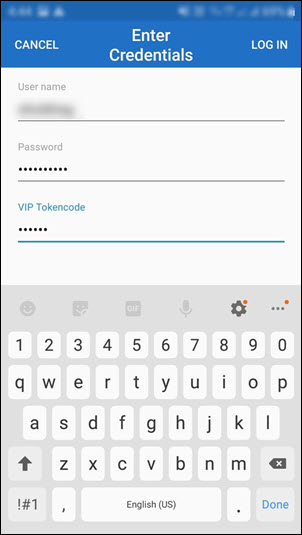
Provide authentication credentials for your server and tap LOG IN or Done on the keypad.
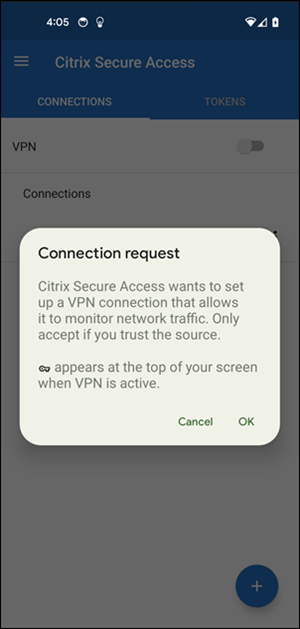
The connection request message appears. Click OK.
Note: This message appears only the first time that any VPN connection is established by Citrix Secure Access. If user allows the connection first time, this message is not shown again until the user uninstalls and reinstalls the app.
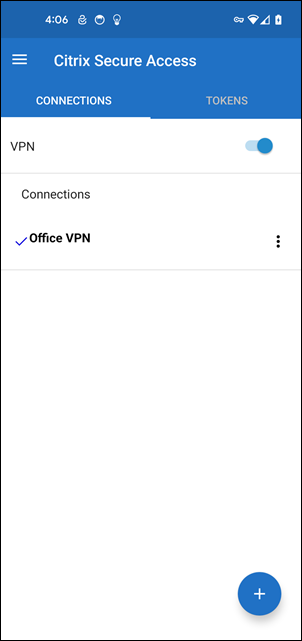
Note: To log out from Citrix Secure Access, turn the VPN switch OFF.
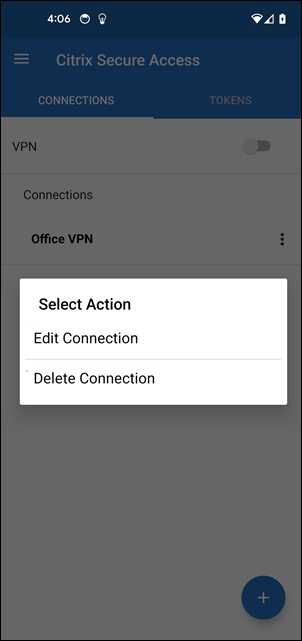
Modify or delete an existing connection
You can edit or delete a connection after you log out from Citrix Secure Access.
Tap and hold the server name and select Edit Connection or Delete Connection.
Reconnect to NetScaler Gateway after a VPN connection failure - Preview
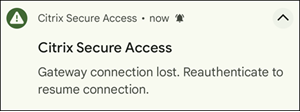
Starting from release 23.10.1, Citrix SSO for Android prompts you to reauthenticate with NetScaler Gateway when a VPN connection is lost. You are notified on the UI and the notification panel of your Android device indicating that the connection to NetScaler Gateway is lost and that you must reauthenticate to resume the connection.
Note:
This feature is in preview.
Receive or block notifications on Android 13+ devices
Starting from Citrix Secure Access for Android release 23.12.1, when you install or reinstall Citrix Secure Access client on Android 13+ devices, you are prompted to provide permissions to receive notifications from Citrix Secure Access client. If you deny the permission, you do not receive any VPN status or push notifications from Citrix Secure Access client on your Android device.
You can navigate to Settings > Notifications on your Android device to change the notification permissions.
In the following example, the VPN status notifications have been disabled.
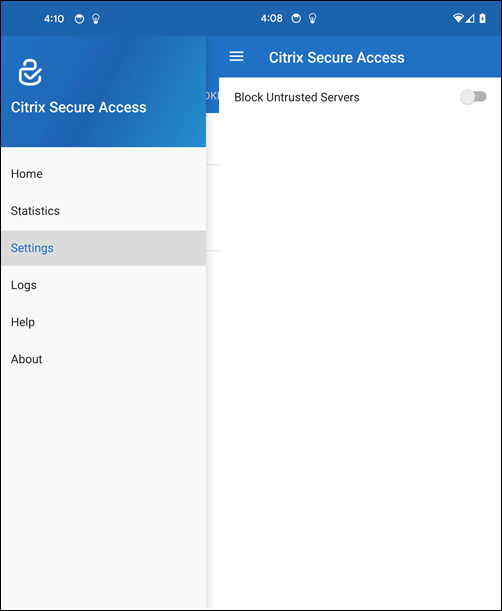
Block untrusted servers
Citrix Secure Access does not connect to untrusted servers, by default. Untrusted servers refer to servers using self-signed certificates or not having trusted root certificate for the gateway. To allow these types of connections, you can turn Block Untrusted Servers switch OFF.
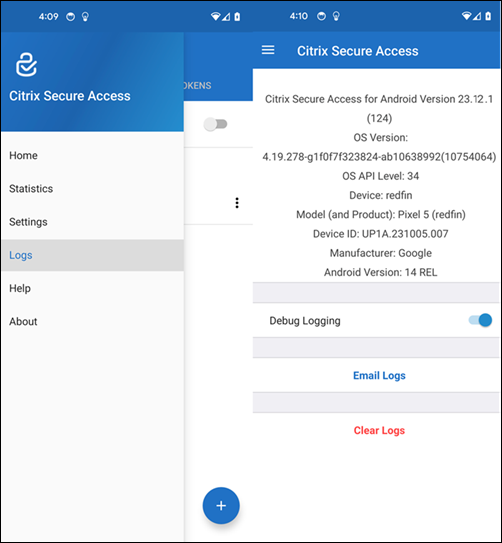
Enable debug logs
Capturing debug logs is a critical part of troubleshooting or reporting issues to Citrix Support. Tap the Debug Logging switch ON to turn on debug logging for Citrix Secure Access. You can email the logs when troubleshooting connection issues using the Email Logs link.
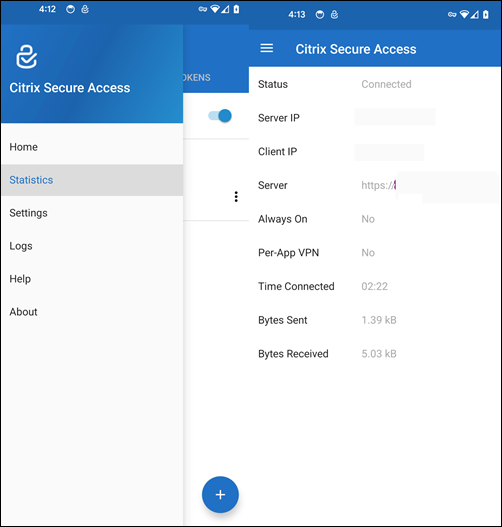
View statistics
You can view the connection statistics when VPN is connected.
Password tokens
You can add a 6-digit password token as a second factor authentication. This code uses the time-based one time password protocol to generate the OTP code.
You can add a password token manually or register a password token using the QR code scan method. Second factor authentication using push notifications is not be enabled if you choose to enter the token manually.
Register a password token
-
Log in to your organization’s manage one-time PIN page in your web browser on a desktop or a laptop.
-
Click Add Device.
-
Enter a name for your device, then click Go.
A QR code is generated.
Add a password token by scanning the QR code on the browser
-
Navigate to Tokens tab on the Home view.
-
Tap + and tap Scan QR Code.
-
Focus the camera on the QR code on your browser.
Citrix Secure Access auto-populates the device name and secret key.
Alternatively, you can manually enter the secret key that appears above the QR code.
Citrix Secure Access validates the QR code and then registers with gateway for push notifications. If there are no errors in the registration process, the token is successfully added to the tokens tab.
Note:
- You must allow camera permissions for Citrix Secure Access to capture the QR code.
- You must enable the device PIN/password on your device.
Add a password token manually
-
Navigate to Tokens tab on the Home view.
-
Tap + and tap Enter Manually.
-
Enter the device name and the secret key as it appears on the password token generated on the browser.
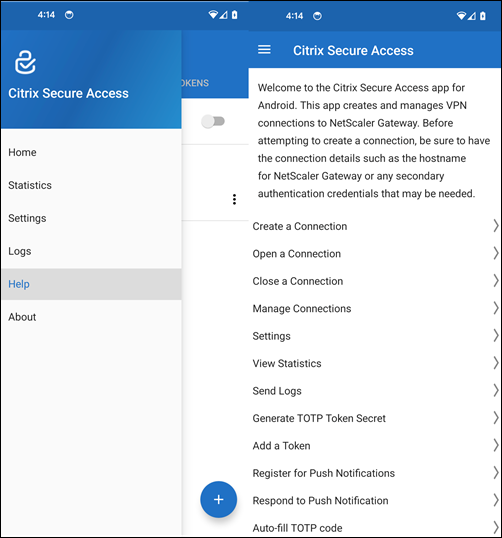
Help topics
For more information about how to use Citrix Secure Access, see Help.